A window you can state exactly
Start date, end date and the number of continuous days, recorded as the campaign ran rather than reconstructed afterwards.
The full journey, from campaign setup to the testing evidence you keep afterwards: what your team does, what we handle, and where the boundaries are.
Closed testing has a fixed shape. What varies between teams is how much of the coordination work they have to hold in their heads.
Your Google Play account stays yours. You create the closed testing track, manage the release, and submit the production access application. None of that changes, and we never ask for access to your Play Console.
What we take on is everything around it: keeping the tester roster accurate, knowing which testers have opted in and which have gone quiet, tracking days elapsed against the window you committed to, and holding the feedback in a form you can actually use later.
Setup is measured in hours, not weeks. The part that dominates the calendar is the testing window you commit to, which is set by Google's current requirements for your account type rather than by us.
Because Google's requirements change, confirm the current minimum tester count and continuous-day requirement in the official Play Console documentation before you commit to a date.
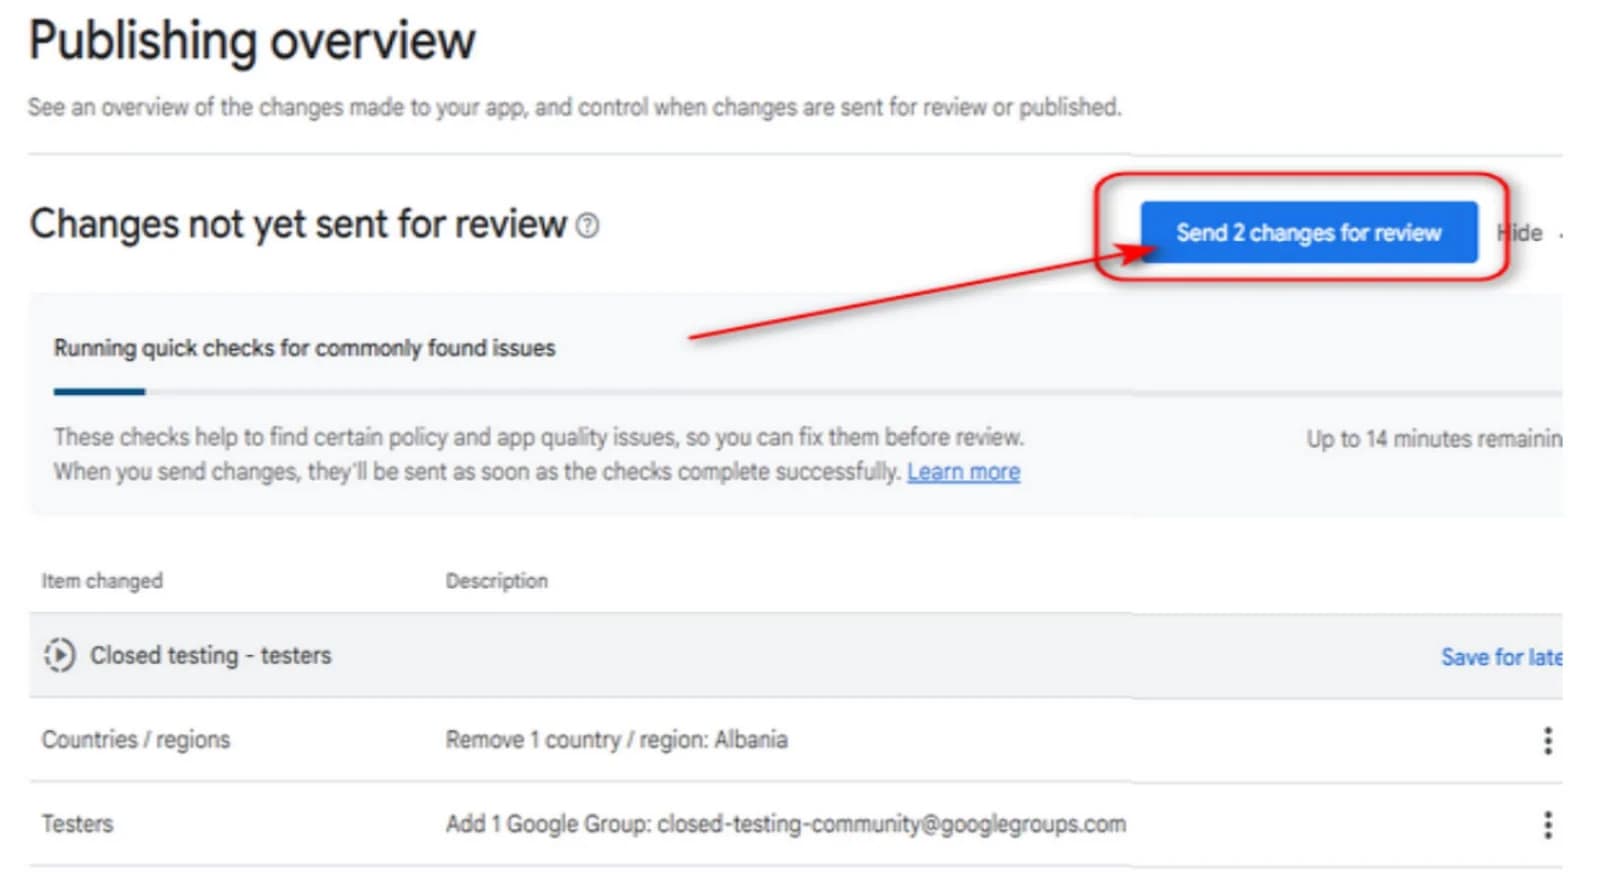
This part stays with you. Five screens in the Play Console, in the order you reach them. These are the real console screens, not illustrations.
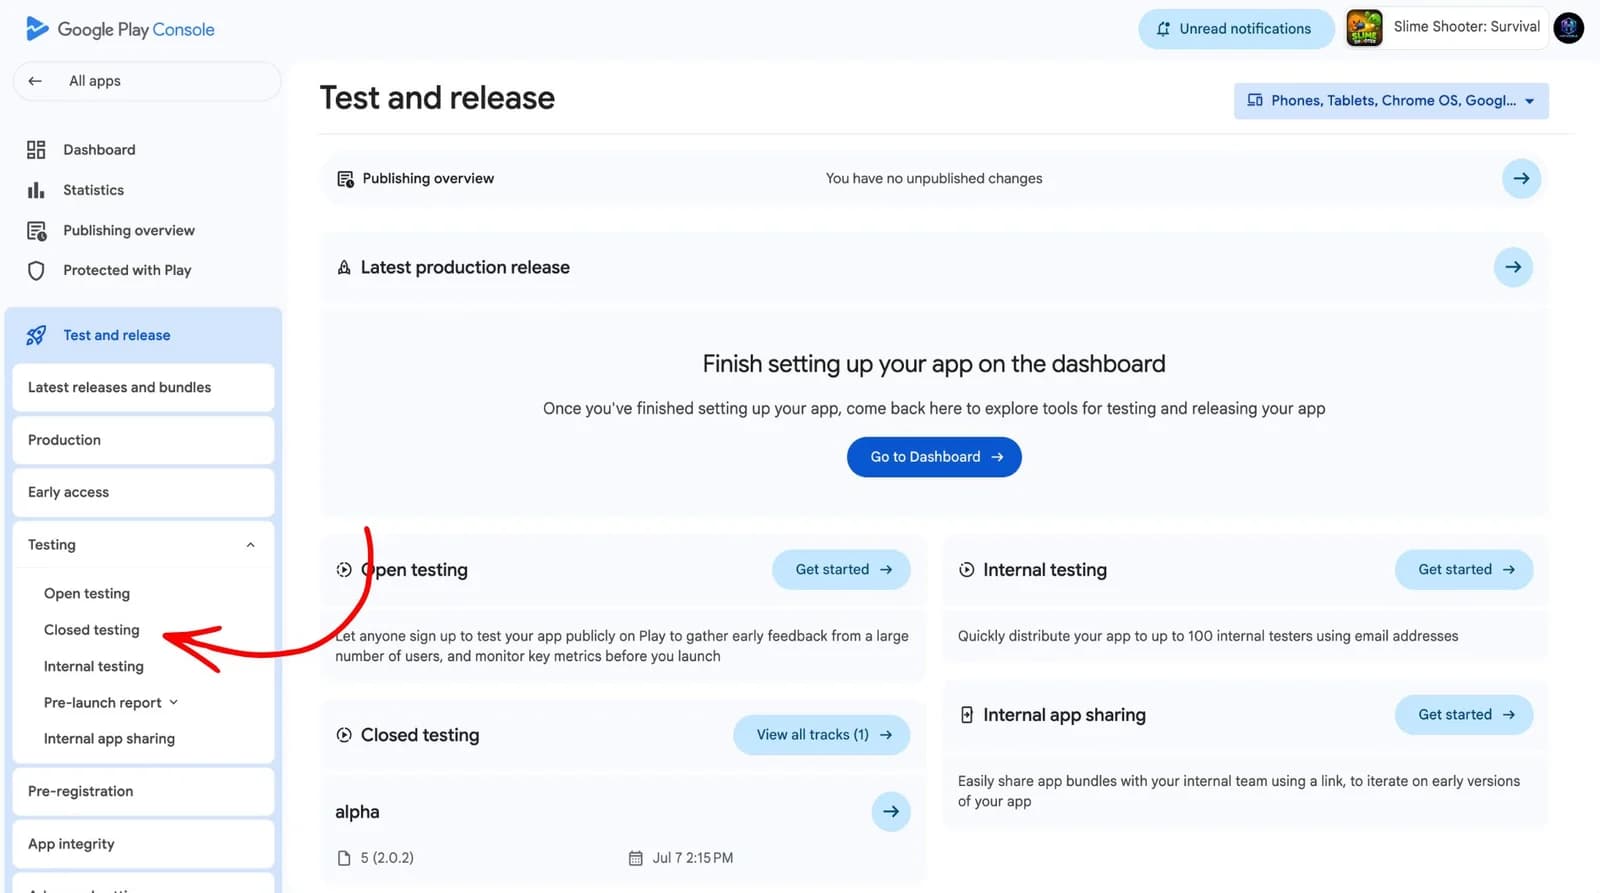
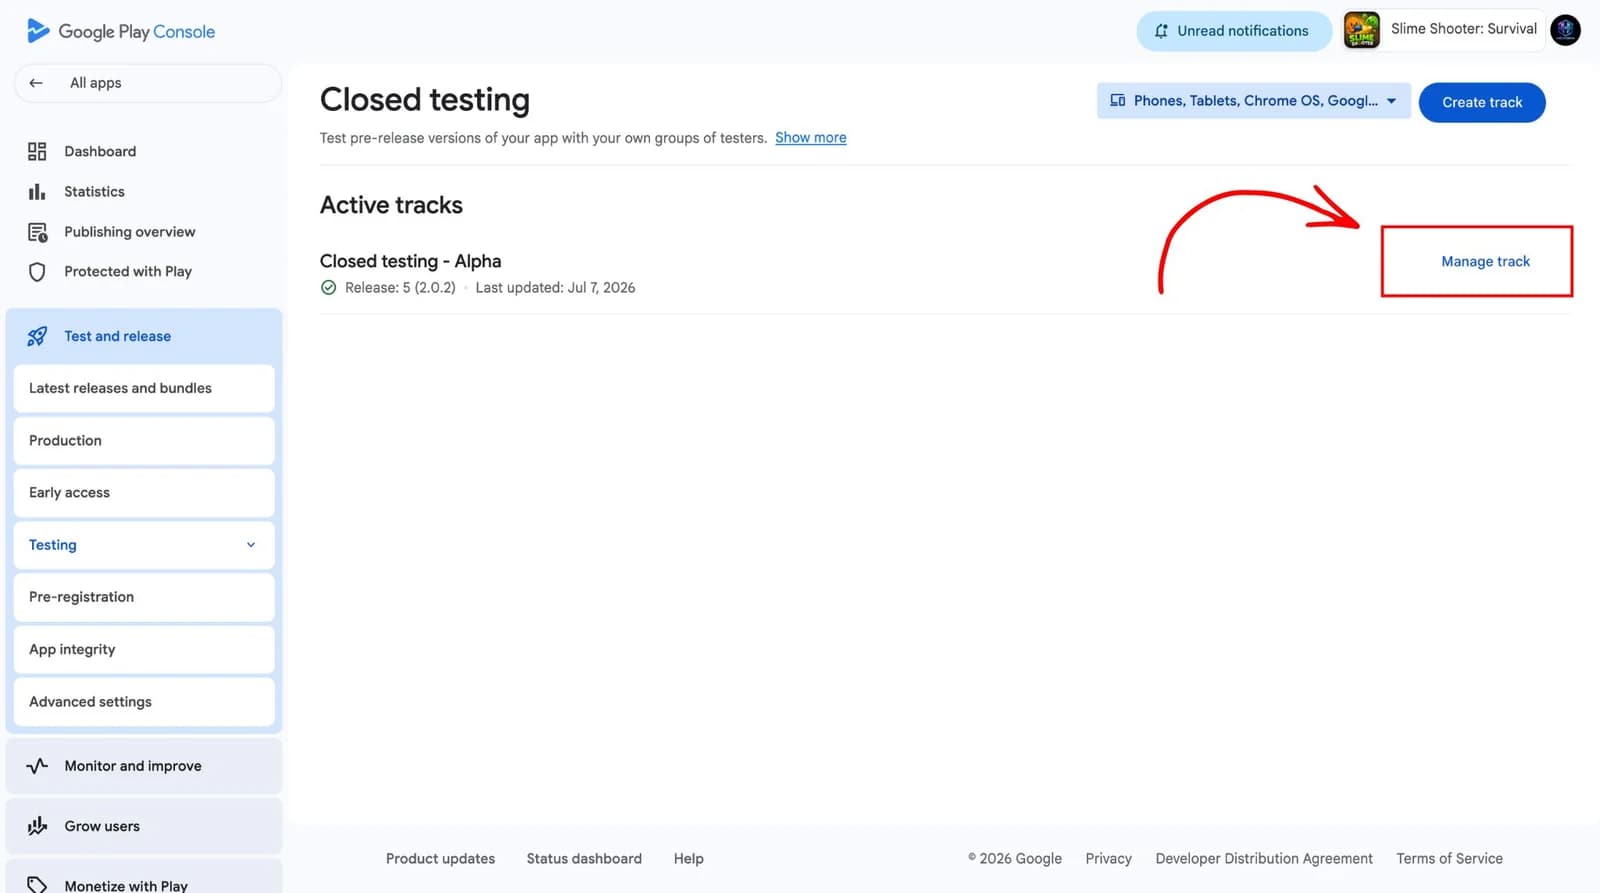
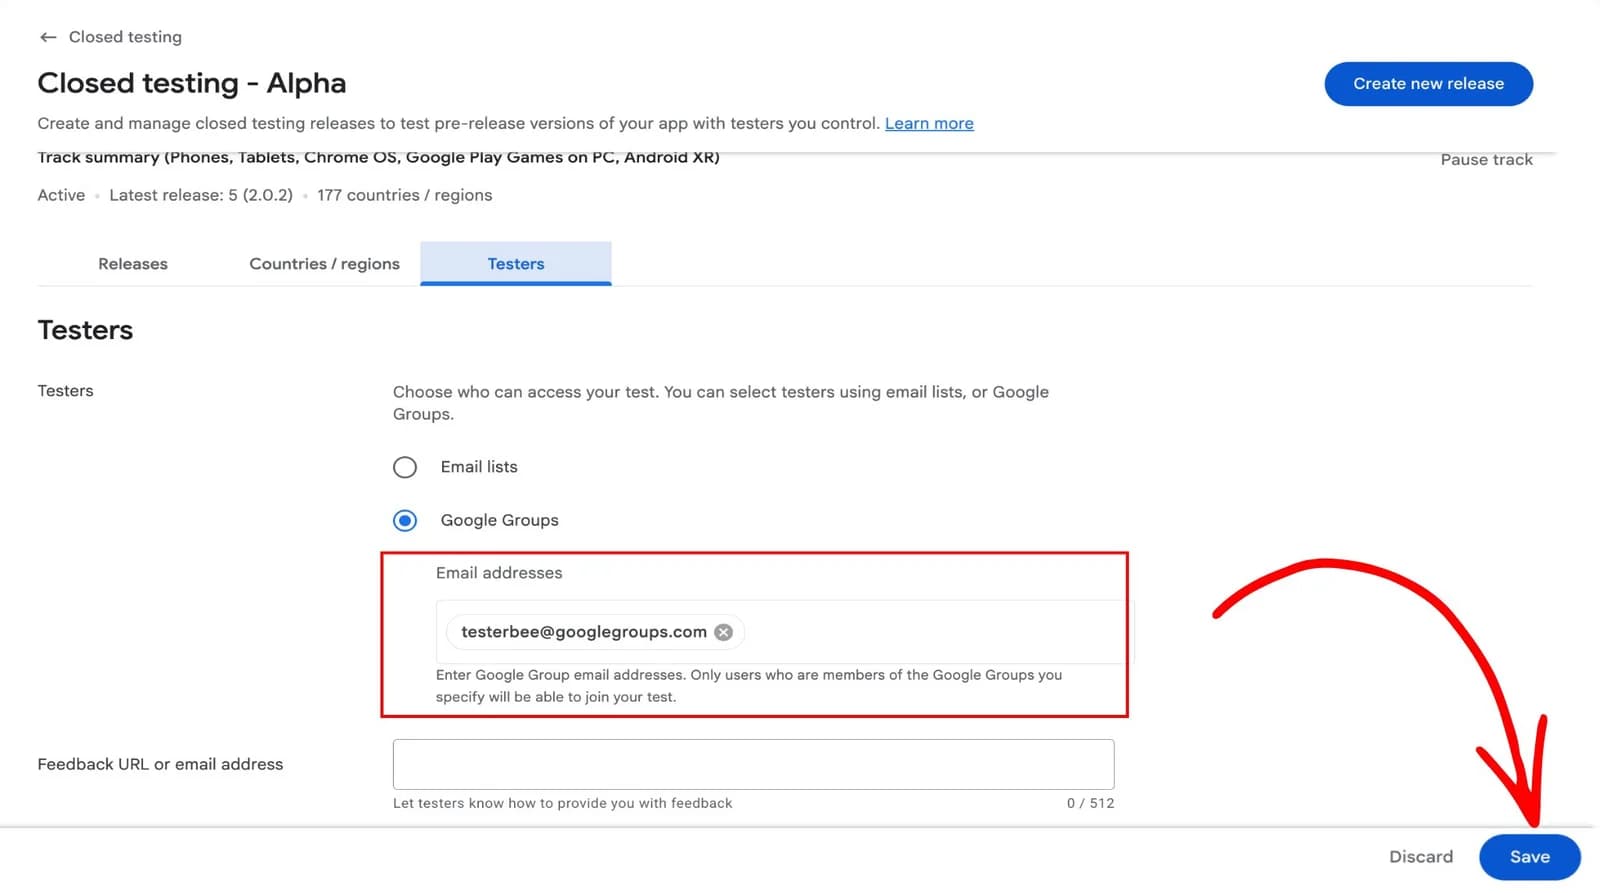
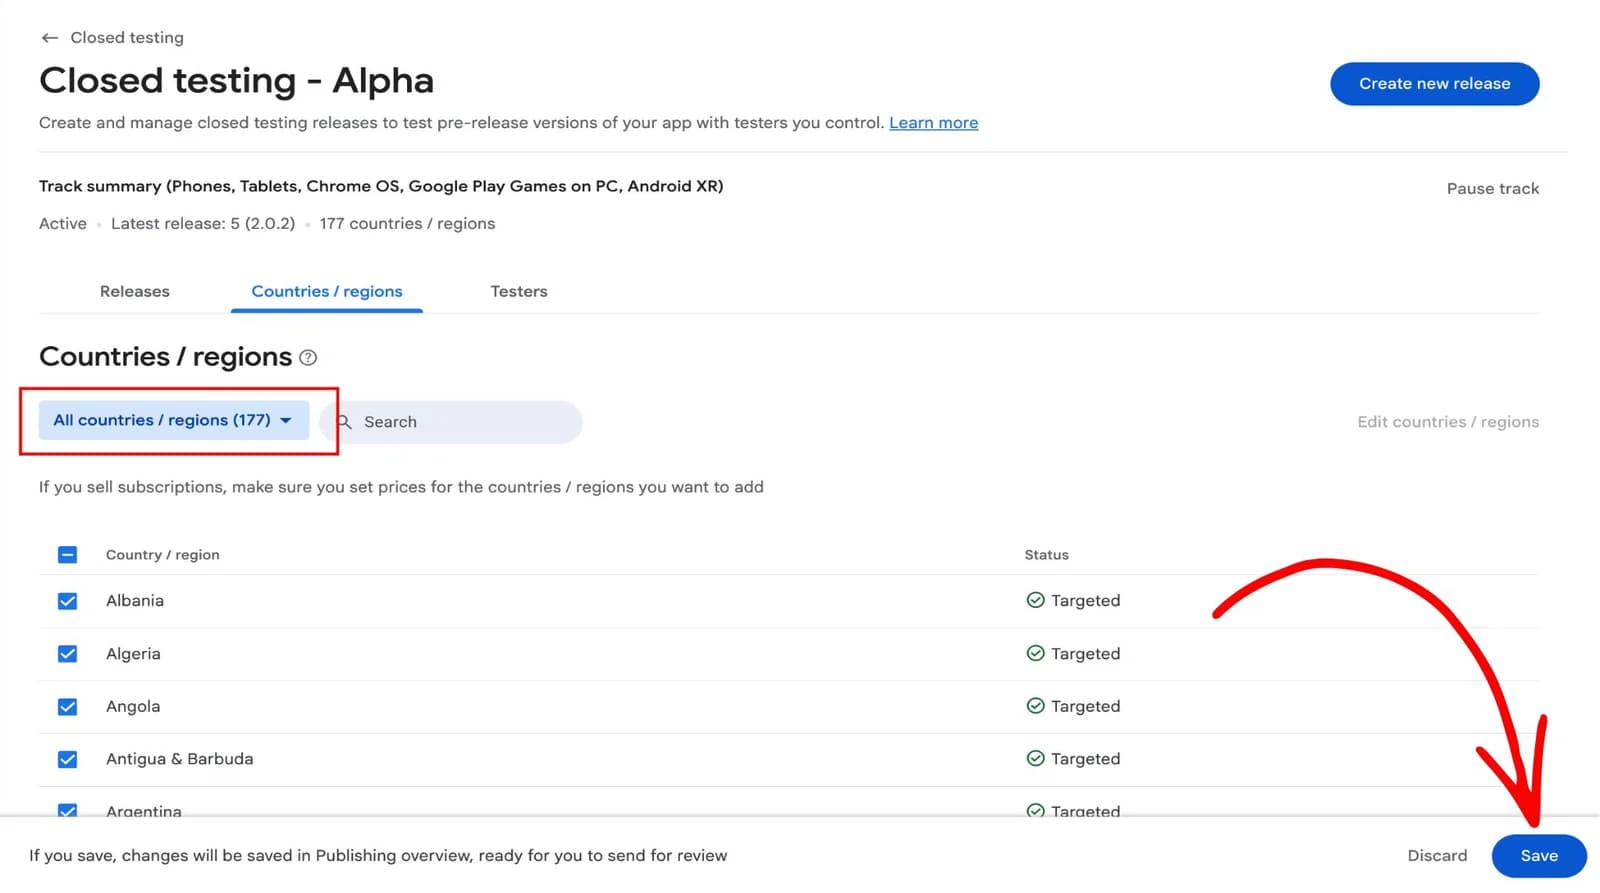
Each stage has a defined output. Nothing moves forward until the previous stage is actually complete.
Record the app, the build under test, the track you will use and the testing window you are committing to. The campaign is created with the dates already fixed.
Build the roster from the addresses you have, import existing spreadsheets, and track who has accepted the invite and with which Google account.
Participation is monitored continuously. Opt-in status, activity and days elapsed are visible together, so a tester who has gone quiet is spotted while there is still time to replace them.
Findings are logged against the build they came from. At the end of the window the campaign summary records what was tested, for how long and by how many active testers.
Everything else is detail. If these two are right for the whole window, the rest is bookkeeping.
A campaign is healthy when the opted-in tester count stays at or above the threshold you need, continuously, for at least as long as the window requires. Both halves matter. A count that dips in the middle is a different problem from a count that never reached the threshold, and they need different responses.
Production access is granted by Google. What you control is how clear and accurate your testing record is when you apply.
Start date, end date and the number of continuous days, recorded as the campaign ran rather than reconstructed afterwards.
How many testers opted in and how many remained active, tracked separately so you are not overstating the count.
Findings grouped by build and device, so describing what testing surfaced is a matter of reading rather than remembering.
The record exists before the form is filled in, which makes it far easier to describe the testing accurately.
The process questions we are asked most often during onboarding.
Tell us about the app and the testing window you are working towards. We will confirm scope, tester requirements and what happens next before anything starts.
Setup usually takes a single working session once the tester list is available.